







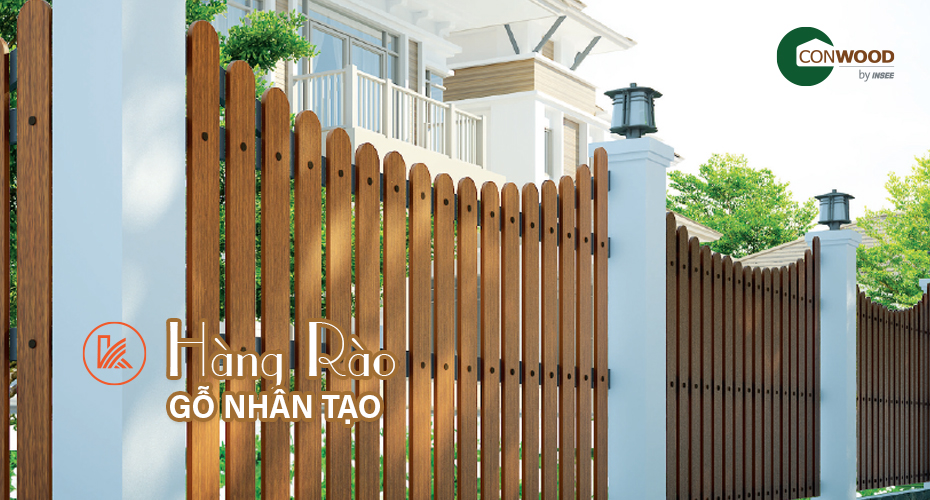
CONWOOD Fence is a line of high-quality artificial wood products, designed to bring exquisite beauty and outstanding durability to exterior spaces. With the perfect combination of aesthetics and performance, CONWOOD artificial wood fences are the perfect choice for all modern projects.
Conwood cement wood is a high-quality artificial wood product, imported directly from Thailand and Indonesia. With its special structure and outstanding advantages, the Conwood brand has become the top choice in many interior and exterior construction and decoration projects around the world.
Special Structure of Conwood Cement Wood
- High Quality Portland Cement: Portland Cement is the main ingredient, providing outstanding strength and durability, ensuring mold resistance, heat resistance and termite resistance.
- Natural Cellulose Fiber: Creates a gentle wood texture, bringing a natural feel like real wood, increasing the bearing capacity and reducing the brittleness of the product.
- High Pressure Heat Press Technology: The ingredients are mixed evenly and compacted under high pressure, creating a sturdy wooden panel that does not warp or crack.
- Surface Finish: Covered with delicate wood grain or painted, giving the product a natural beauty, suitable for many design styles.
Outstanding Advantages of Conwood Cement Wood
- Outstanding Durability: Withstands all harsh weather conditions, from rainstorms to intense sunlight, does not suffer from termites, mold or rot over time.
- Environmentally Friendly: The product does not exploit natural wood, minimizing impact on forests and the environment.
- Easy to Install and Maintain: Light weight, easy to transport and apply, stain-free surface, easy to clean, saves maintenance time.
- Diversity in Design: A variety of surfaces and colors are available, from natural wood grain to modern designs, meeting the needs of every space.
Conwood is used in garden fences, corridors, or areas that need to ensure high aesthetics and durability.
Why Choose Conwood For Your Project?
- Quality assurance: High durability, good strength and weather resistance.
- Outstanding aesthetics: Natural beauty like real wood, suitable for many architectural designs.
- Cost-saving: Reasonable price, easy to maintain and long-lasting.
With Conwood cement wood, your living space will be enhanced in aesthetics and durability, bringing outstanding value to every project!
Construction and Installation Instructions for Conwood Cement Wood Fence
Conwood cement wood fence not only brings natural beauty and luxury, but is also the perfect solution for those looking for durability and environmental friendliness. However, to achieve the highest efficiency in terms of aesthetics and durability, installation needs to be done with proper techniques. Below are detailed instructions on how to construct Conwood cement wood fences from raw materials to finished coating.
1. Preparation Before Construction
Materials and Tools Needed to Prepare:
- Materials:
- Conwood cement wooden bar (raw form, natural cement color).
- Primer and color coat as required.
- Specialized glue (if needed).
- Bolts, screws and fixing accessories.
- Tools:
- Cutter or saw.
- Electric drill and screwdriver.
- Ruler, marker pen.
- Paint brush, spray gun or roller.
2. Conwood Fence Installation Construction Process
Step 1: Plan and Measure
- Determine location: Mark the area where the fence needs to be installed.
- Measurement: Use a ruler to determine the size and distance between fence posts.
- Drawing: Design a fence diagram to calculate the exact number of Conwood bars needed to use.
Step 2: Construction of the Frame
- Pouring the foundation: Make sure the concrete foundations of the columns are sturdy, have equal heights and spacing.
- Installing poles: Attach iron or concrete poles to the marked position, fix firmly to make the main frame for the fence.
- Installing horizontal bars: Fix horizontal bars (iron, steel or Conwood) between the posts to create support for the fence bar.
Step 3: Install Conwood Bar
- Cut to size: Use a saw to cut the Conwood bar to the required size.
- Drill holes: Drill holes in the Conwood bar to screw into the frame.
- Installation: Fix each Conwood bar to the frame with bolts or screws. Make sure the distance between the bars is even to create aesthetics.
Step 4: Finishing the Coating
- Primer:
- Paint a primer to increase adhesion and protect the Conwood bar.
- Wait for the paint to dry completely (about 2-4 hours).
- Color coating:
- Use water-based or oil-based paint, spray or roll evenly on the surface.
- Can be painted 2-3 layers to achieve desired gloss and color.
- Make sure each layer of paint is completely dry before applying the next layer.
- Finishing Check: After the paint dries, carefully inspect the entire fence to ensure there are no paint or surface defects.
3. Effective Construction Tips
- Choose high-quality paint: Make sure the fence is waterproof, fade-resistant and resistant to harsh weather.
- Construction in good weather conditions: Avoid construction on rainy days or high humidity to ensure the paint layer dries properly.
- Regular inspection: After completion, periodically inspect the fence for maintenance and repair if necessary.